Image Color Separation
In this tutorial you will learn how to separate colors layers for Riso. You can use these steps for photos or illustrations. See what your image will look like using different riso colors, add or remove colors, adjustments and save your print file.
-
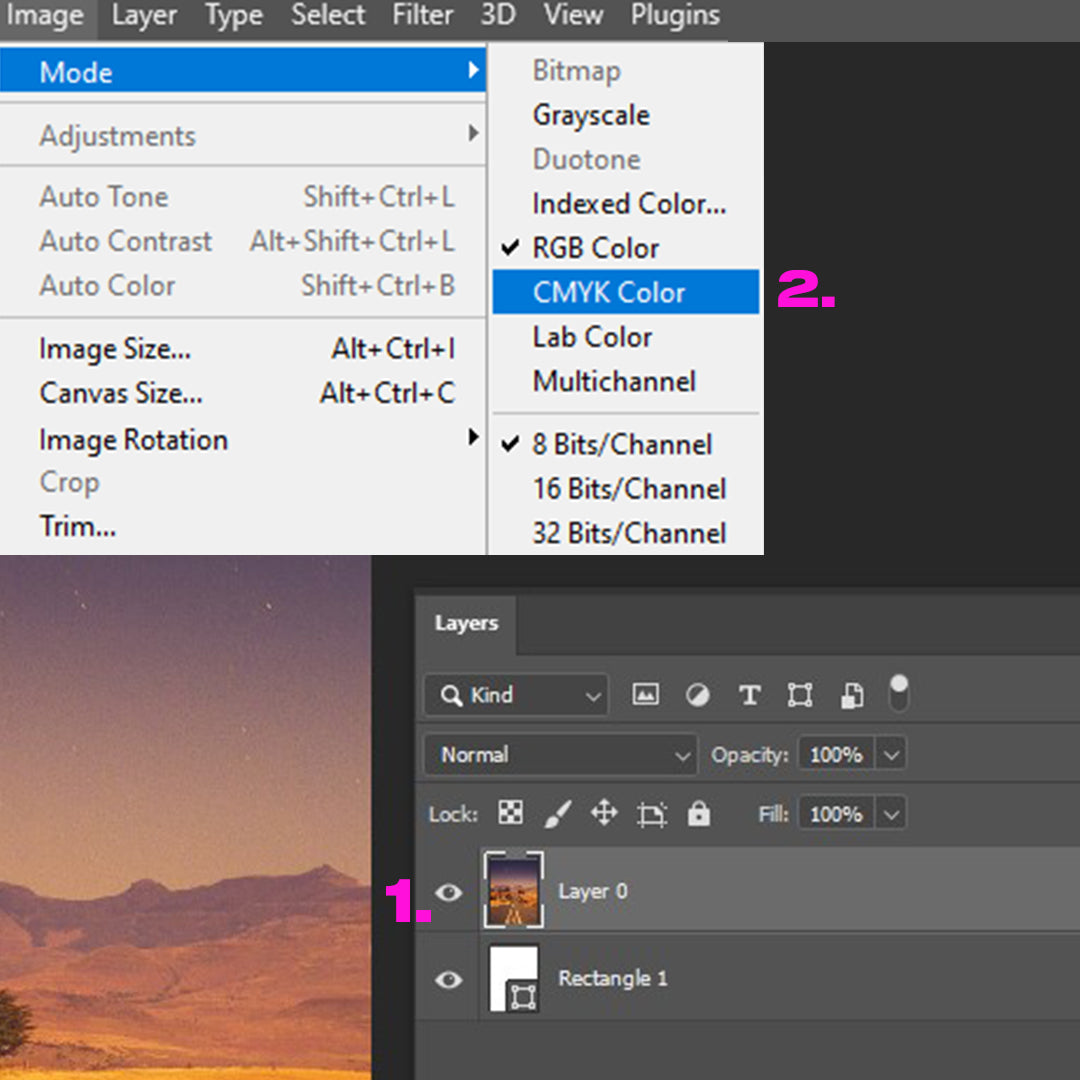
Flatten + CMYK
1. Open your image file making sure it's flattened (No layers or adjustment layers).
2. Set your image to CMYK -
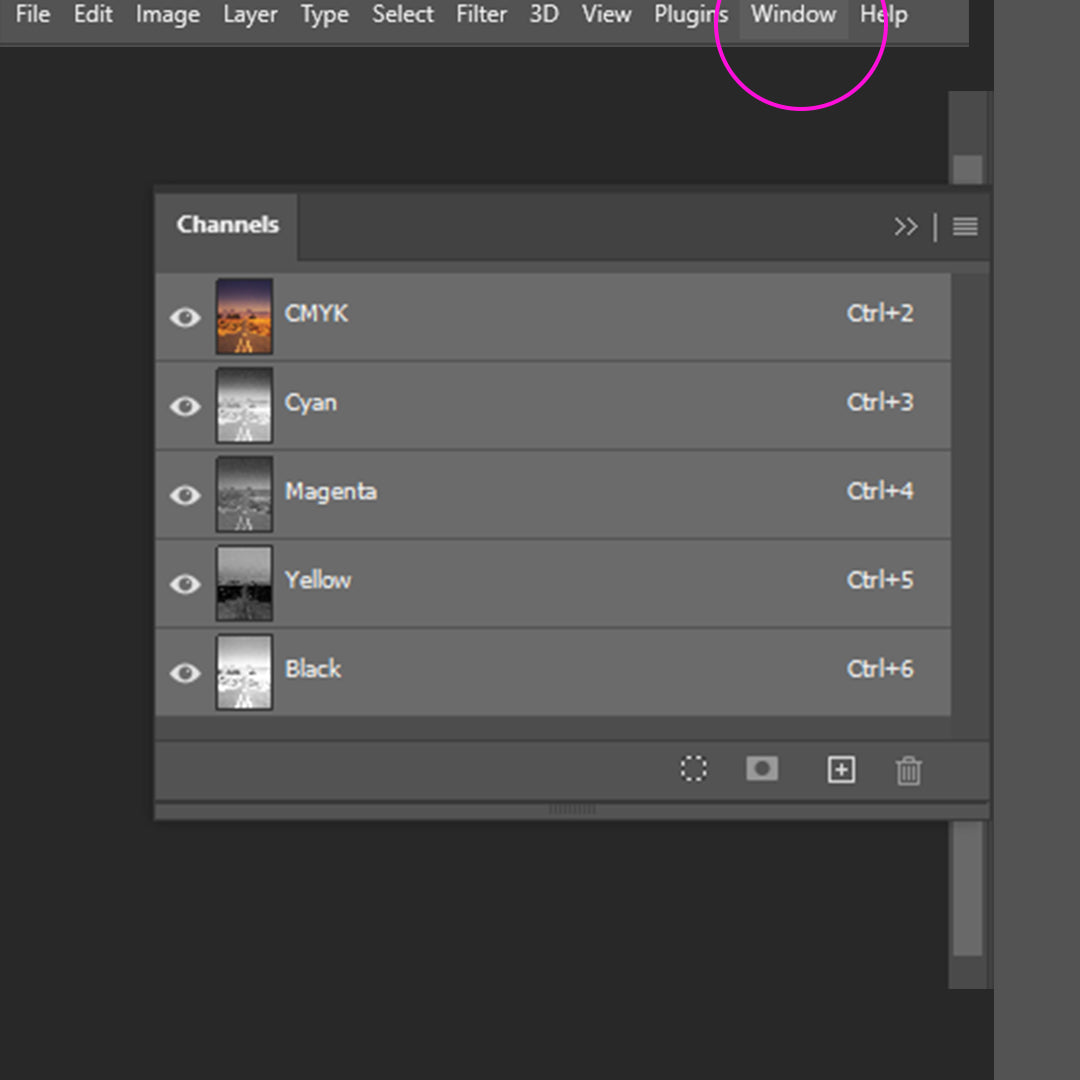
Channel Panel
Open Channels, you can find it in the windows tab.
-
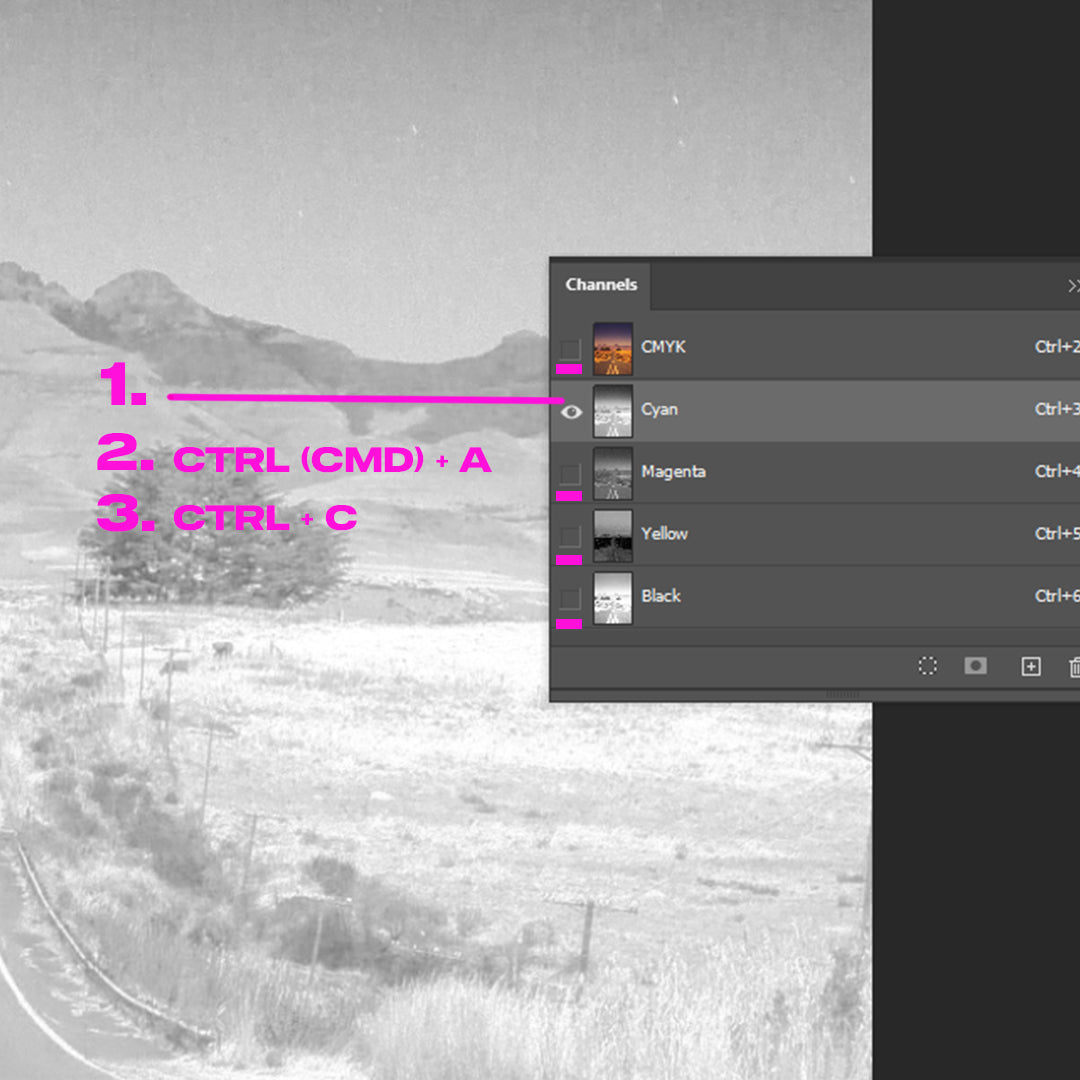
Copy each color channel
You will need to individually copy each color channel. (Exept CMYK)
1. Hide all other channels except the one you want to copy.2. With the channel selected, hit CTRL (or ⌘ Cmd) + A (to select the channel)
3. CTRL (or ⌘ Cmd)+ C to copy it -
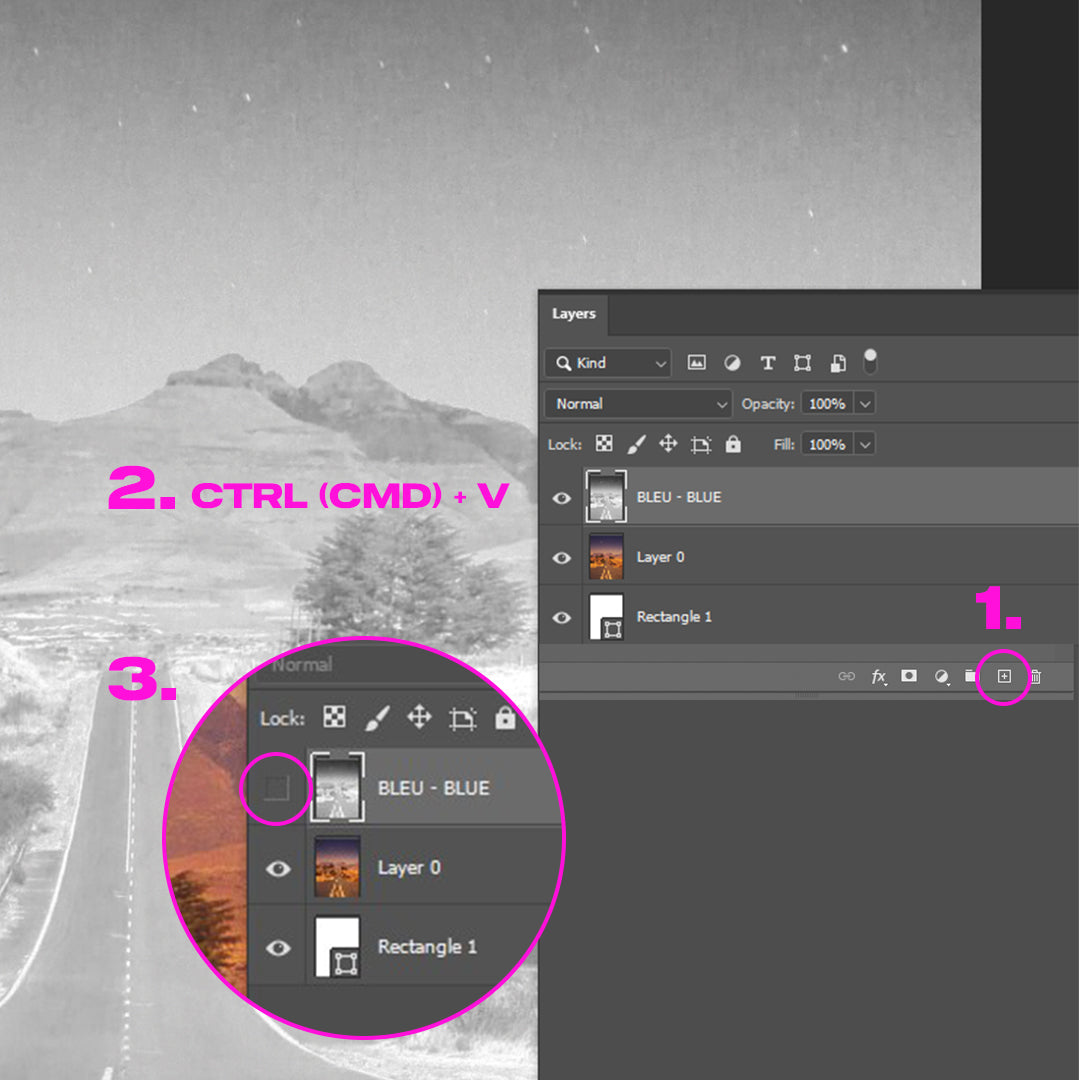
Paste in layers
1. Go back to your layers panel and create a new layer.
2. Hit CTRL (or ⌘ Cmd)+ V to paste the channel. Do this for every color channel.
3. *Make sure that once you pasted onto a new color layer you hide it so the channels panel shows only the color channels of your original image.
-
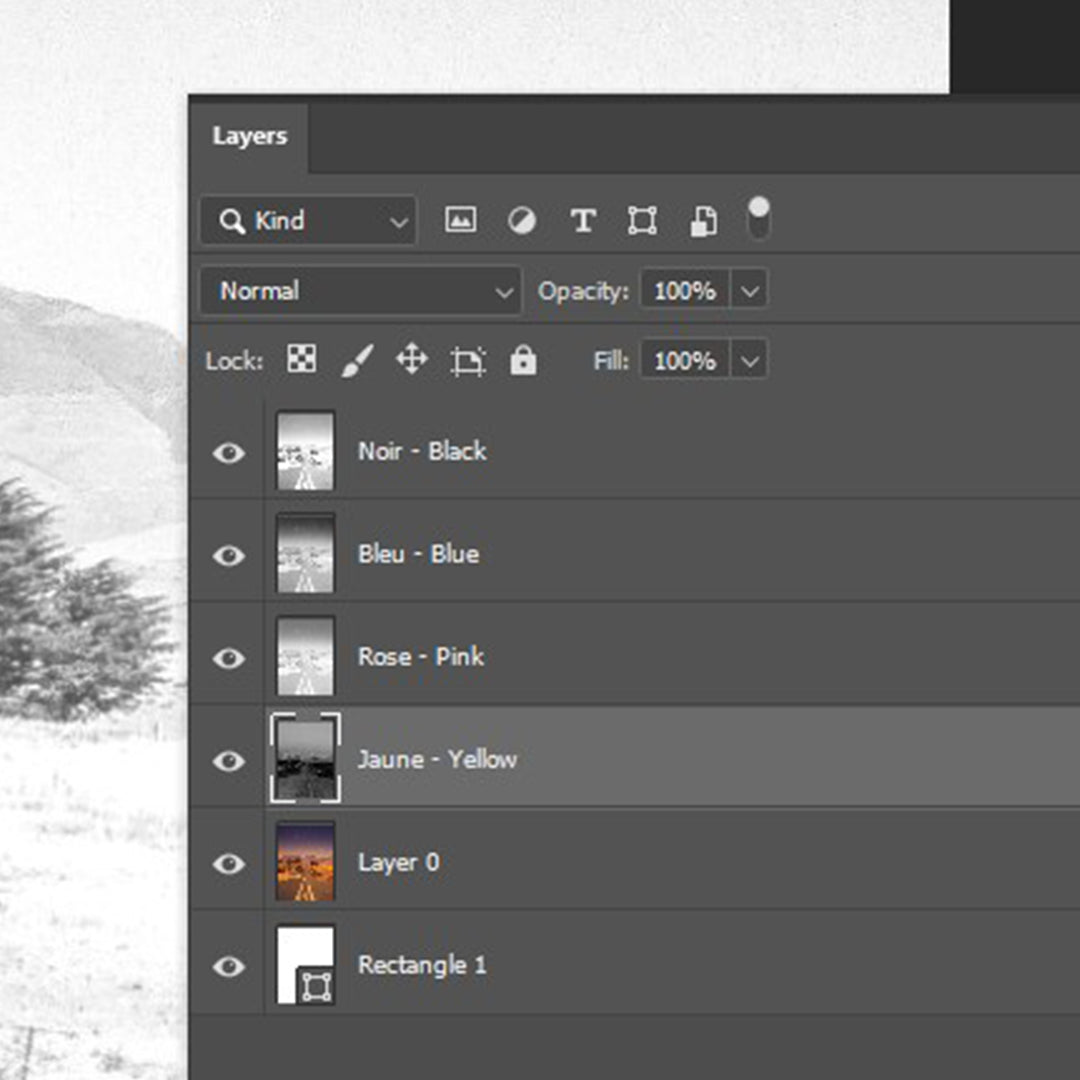
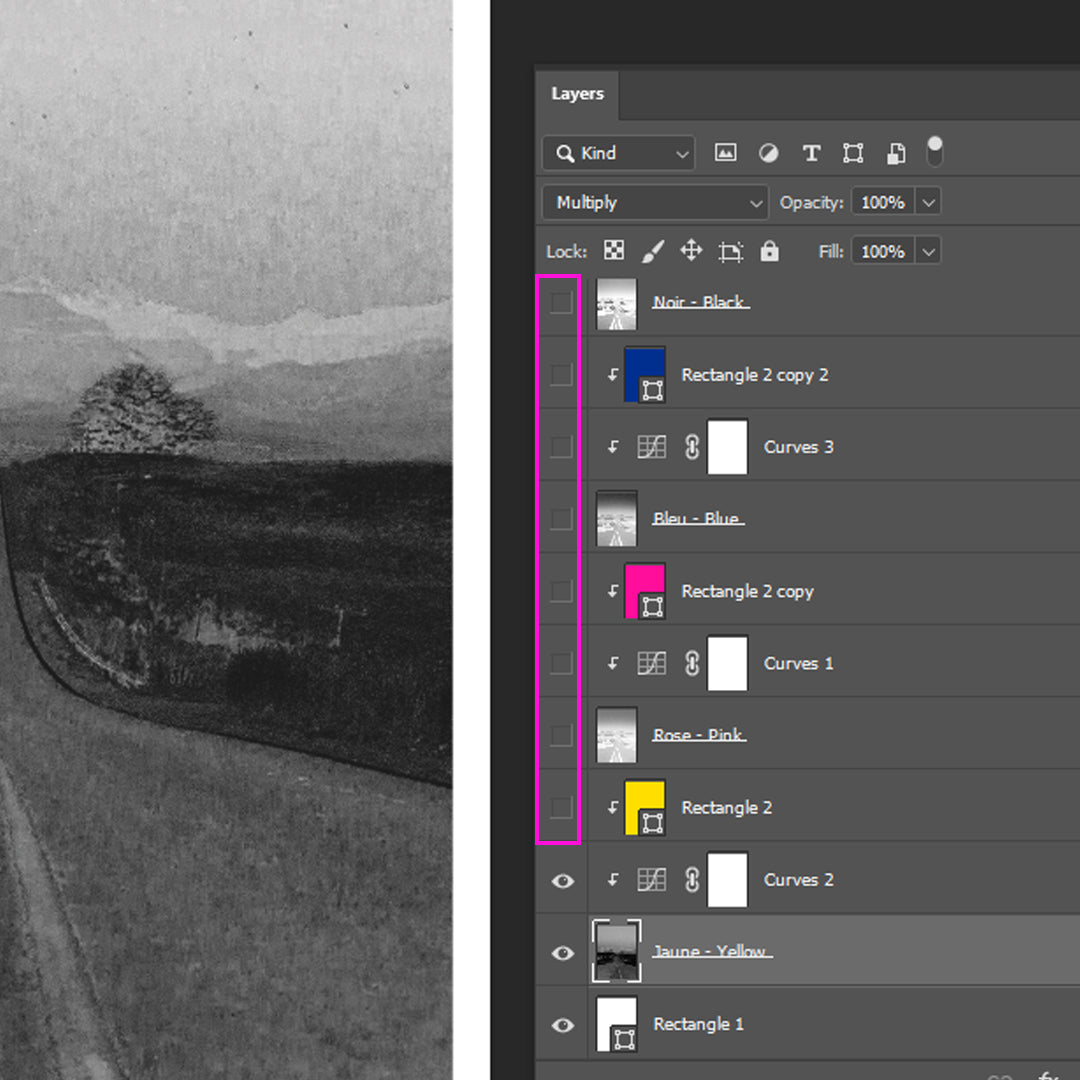
Organize and name layers
We print the lighter colors first. To get an accurate preview on how your colors will overlay, place them in this order, from bottom to top: Yellow, pink, red, blue, black.
-
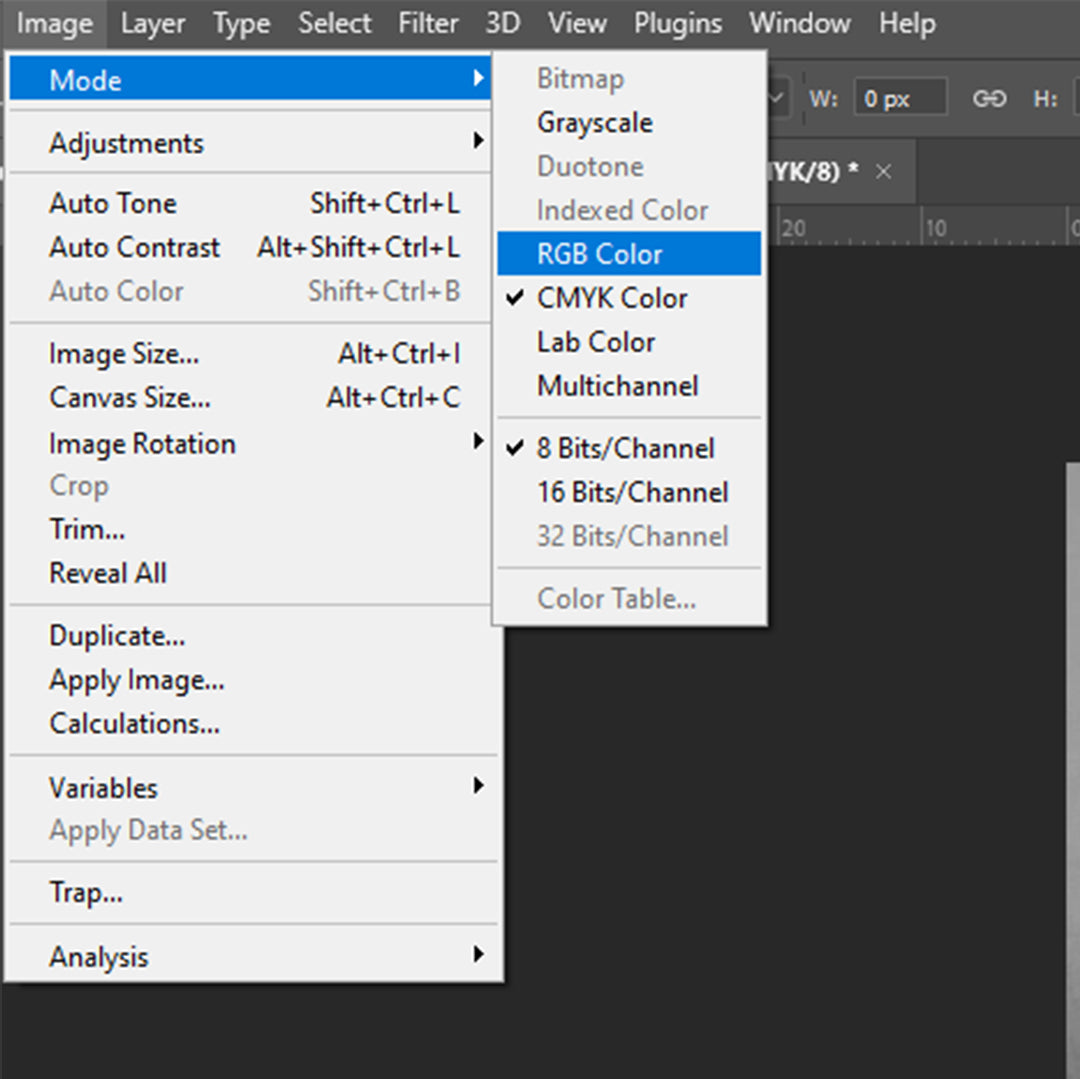
RGB color mode
Riso colors are super bright to emulate them, set your document back to RGB. A promt will ask you to flatten image, do not flatten.
-
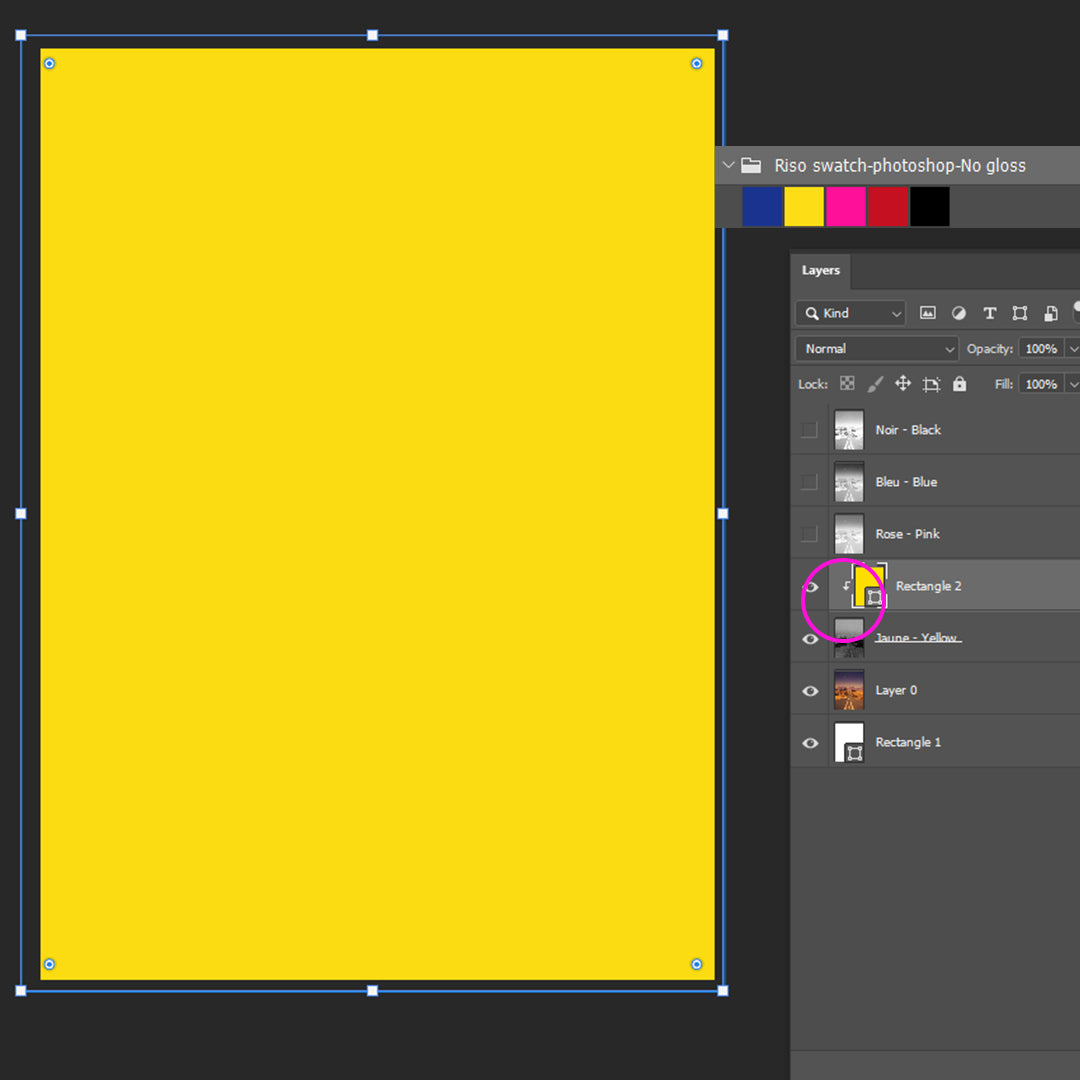
Color preview
See color swatchAn easy way to preview your colors is to apply a fill layer or a rectangle with a clipping mask to your color layer. Apply a color to each layer. Download our Riso color swatch for color accuracy.
-
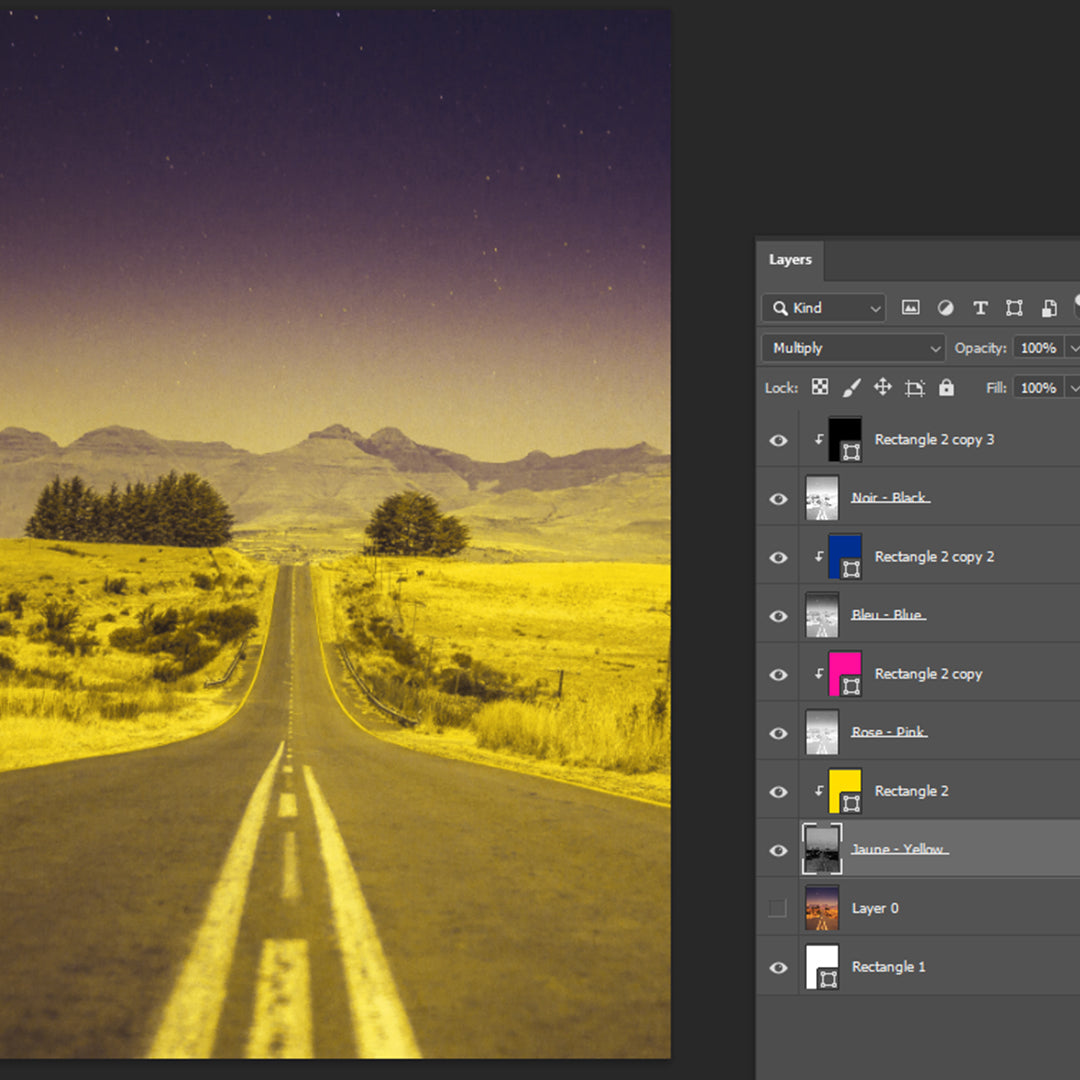
Overlay
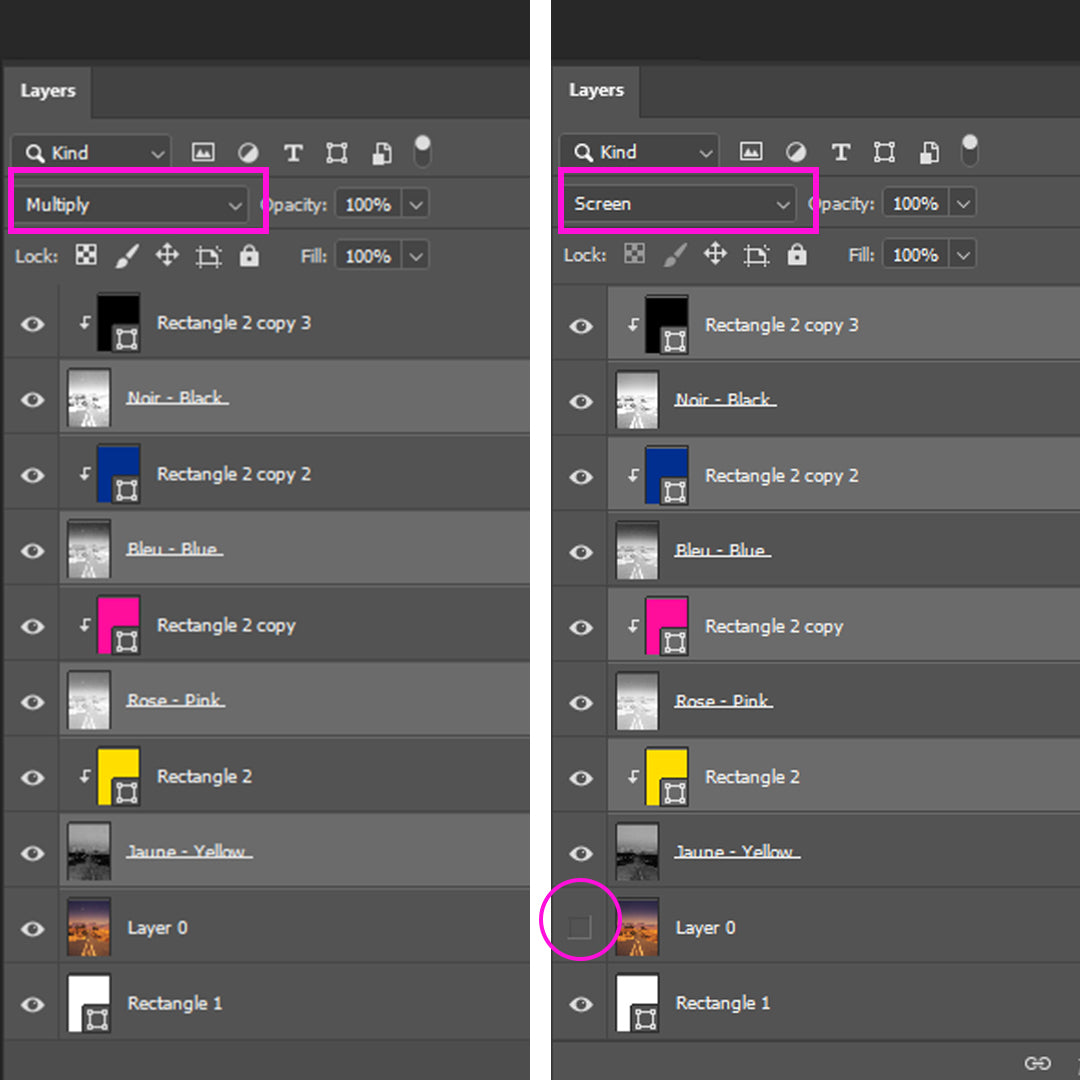
To see how the color layers will overlay:
1. Set all color layers to multiply2. Set color fills or rectangles to screen
3. Hide original image
-
It's looking a little different
You will notice your image not the same as the original because you applied Riso colors instead or RGB or CMYK colors. Let's fix that! Remember that the fluorescent colors will look brighter on paper.
-
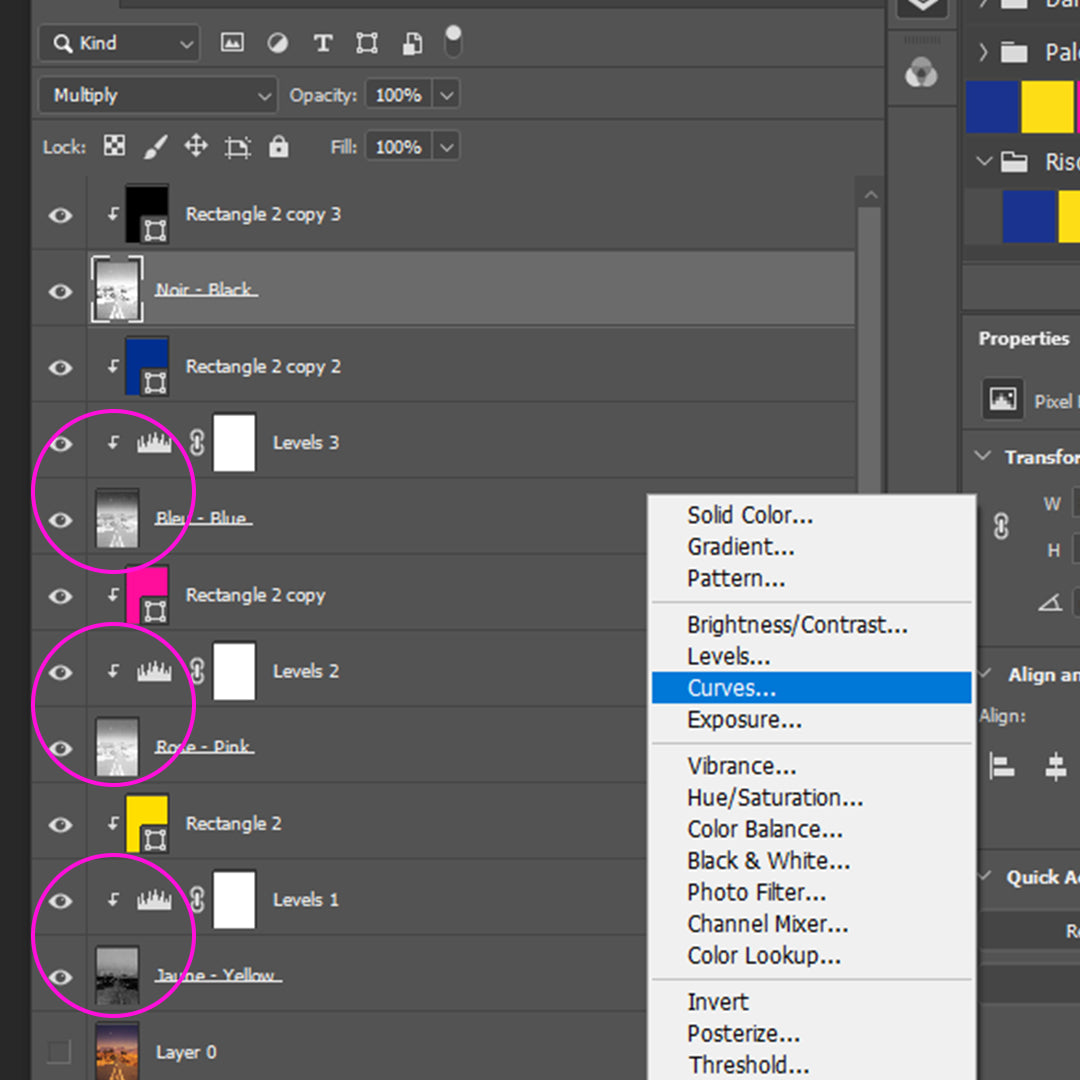
Adjustments
Add adjustment layers like, curves or levels directly to the black and white layers and under the color.
You will see color being added or removed as you lighten or darken certain areas of the layer. -
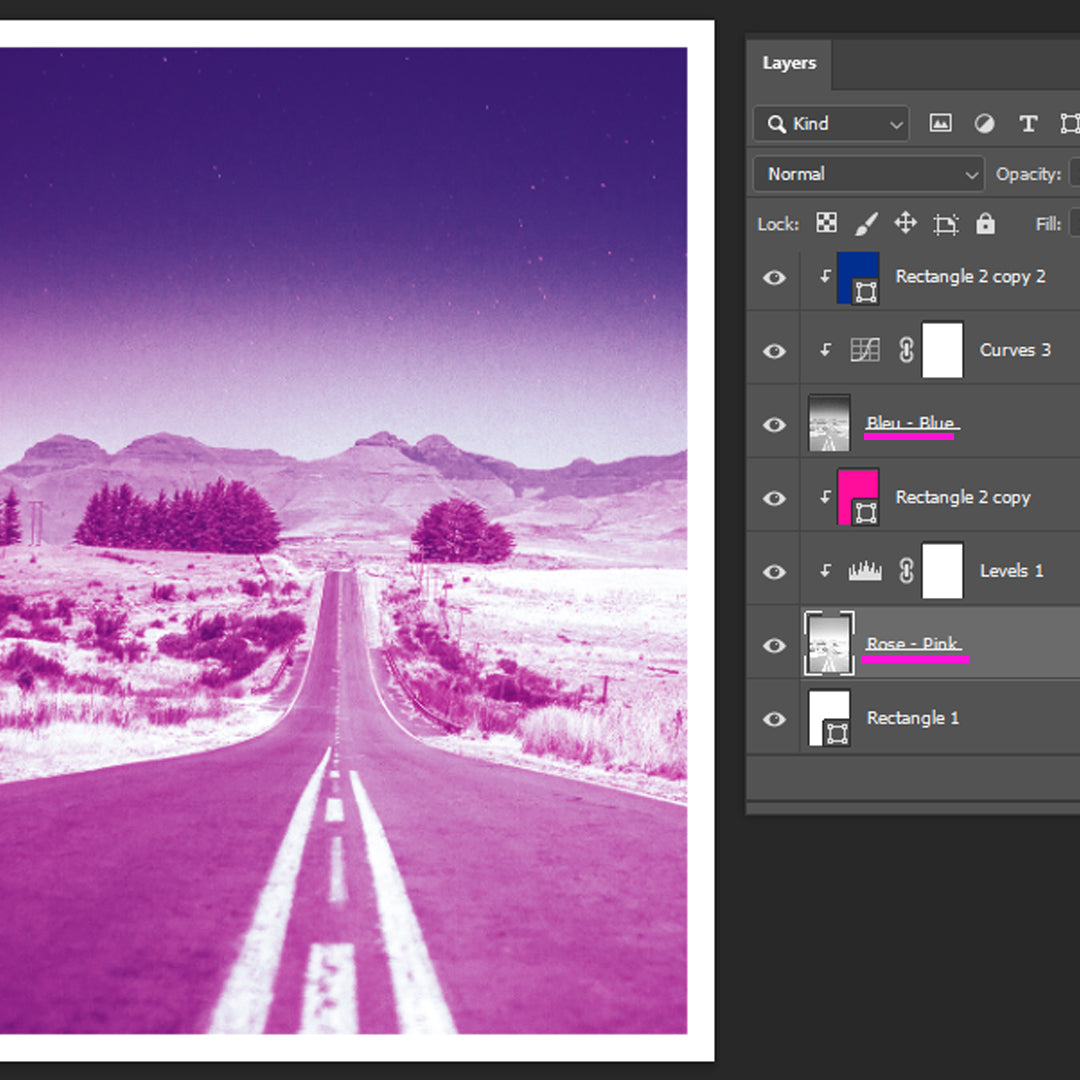
Explore, have fun
You can delete or merge colors layers together: CTRL or ⌘ + E, to get different outcomes.
If you create adjustment layers merge them with their assigned layer first.
Here, we deleted the yellow layer and merged the pink and black together layer, creating a 2 color image instead of 4. -
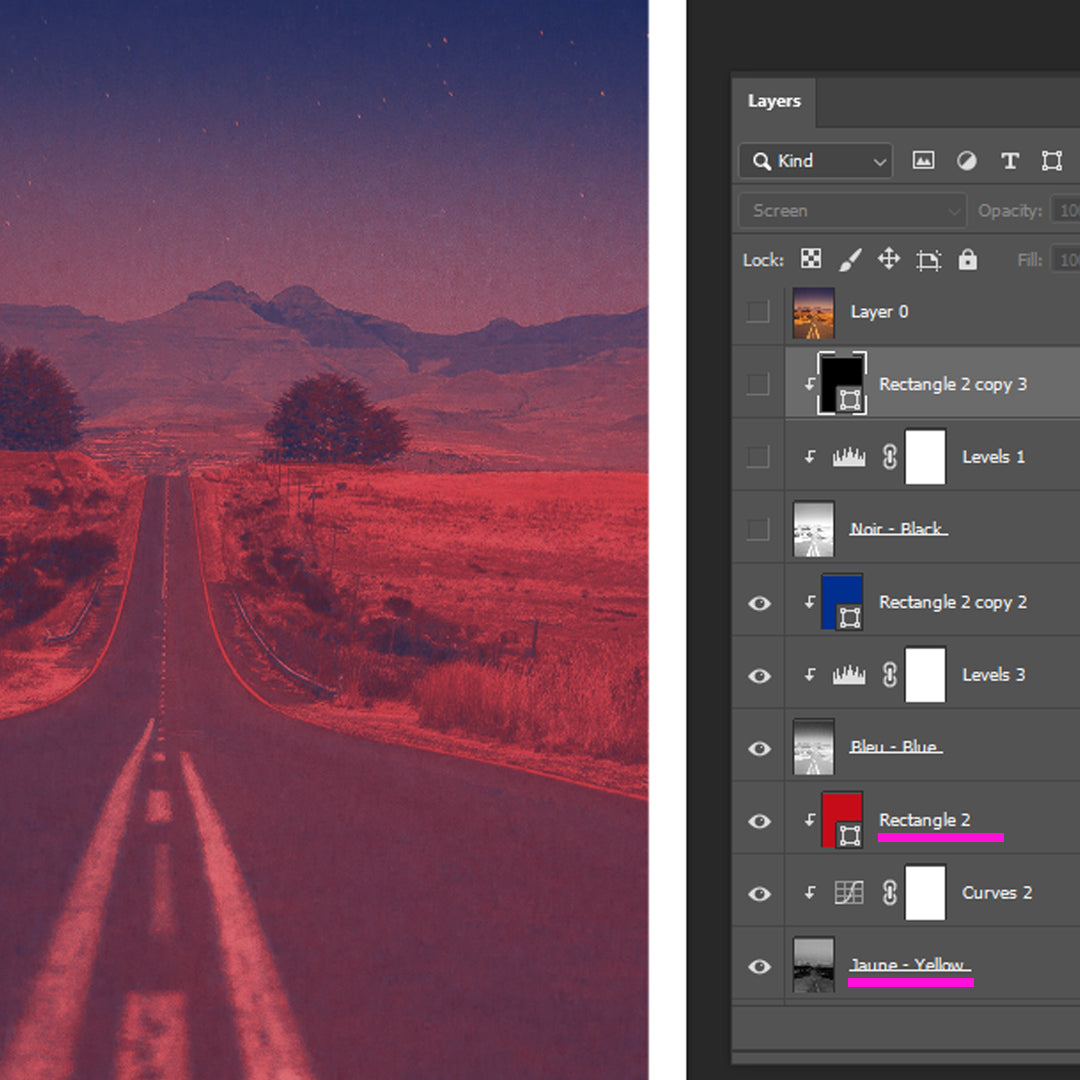
Change it up
See what happens when you apply other colors to different layers, hide color layers or try out an new color.
-
Saving
Riso file set upYou will need to save each color layer separately.
1. Hide all the other layers, colors and adjustment layers.
2. Hide the color rectangle or fill layer only, keep the black and white layer and it's adjustment layers if any visible.
3. Save as a pdf
See our file set up page to make sure your project is saved in the right size. -

PDF Type
When saving your pdf please select the pdf/X1a:2001 option. This reduces the size of the file while retaining the quality plus it's less prone to file errors. Make sure you disable the preserve editing capabilities checkbox.
-
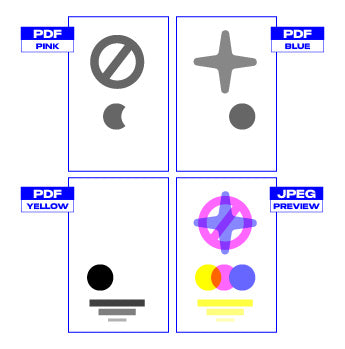
Sending files
Send us a separate pdf for each color layer.Name each one by color. Ex: yellow.pdf, blue.pdf and pink.pdf. Make sure they are in the right black and grey values.Include a full color jpeg of your artwork so I can get an overview of your project.


