Color separation with photoshop
This method is the best way to have to proper color saturation when preparing your files. No skipping steps and please use our templates :)
-
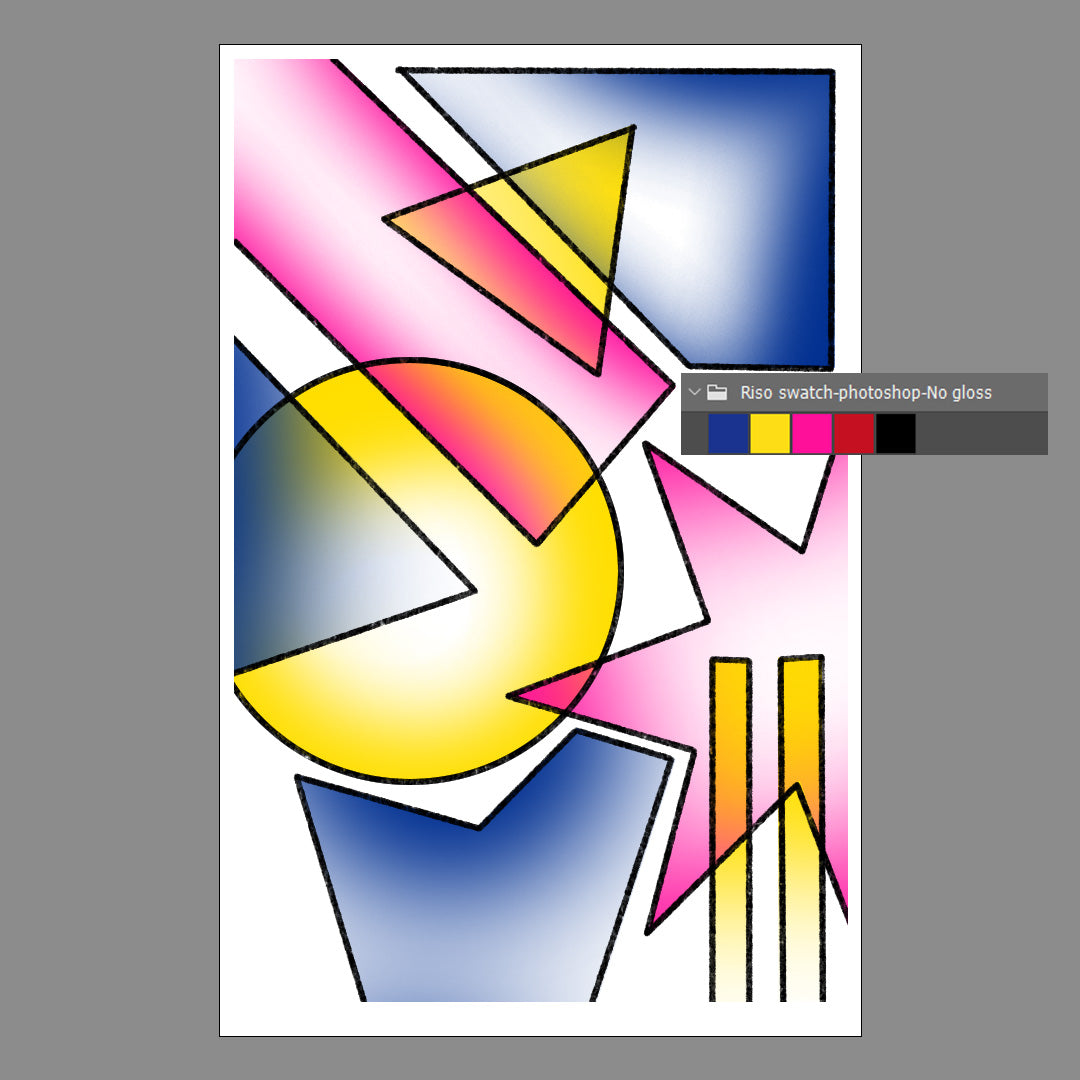
Riso Colors
See color swatchesCreate your file using Riso colors or change them. The riso color swatches are as close as possible to the real thing on screen but will look brighter or different in person.
-
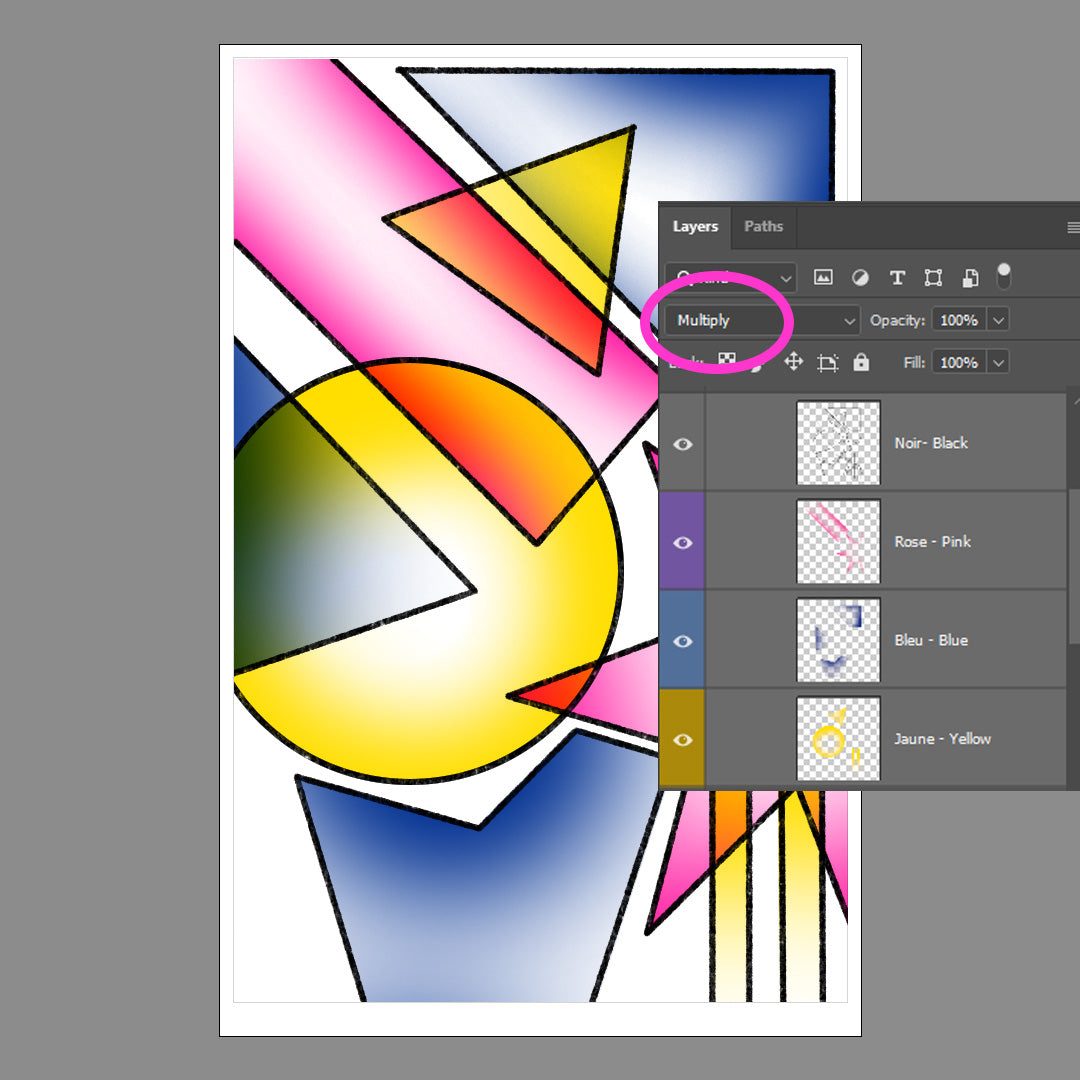
Layers and overlays
Make sure that every color has it's own layer. Set all the layers to multiply so you can
see how the colors will overlay when printed. -

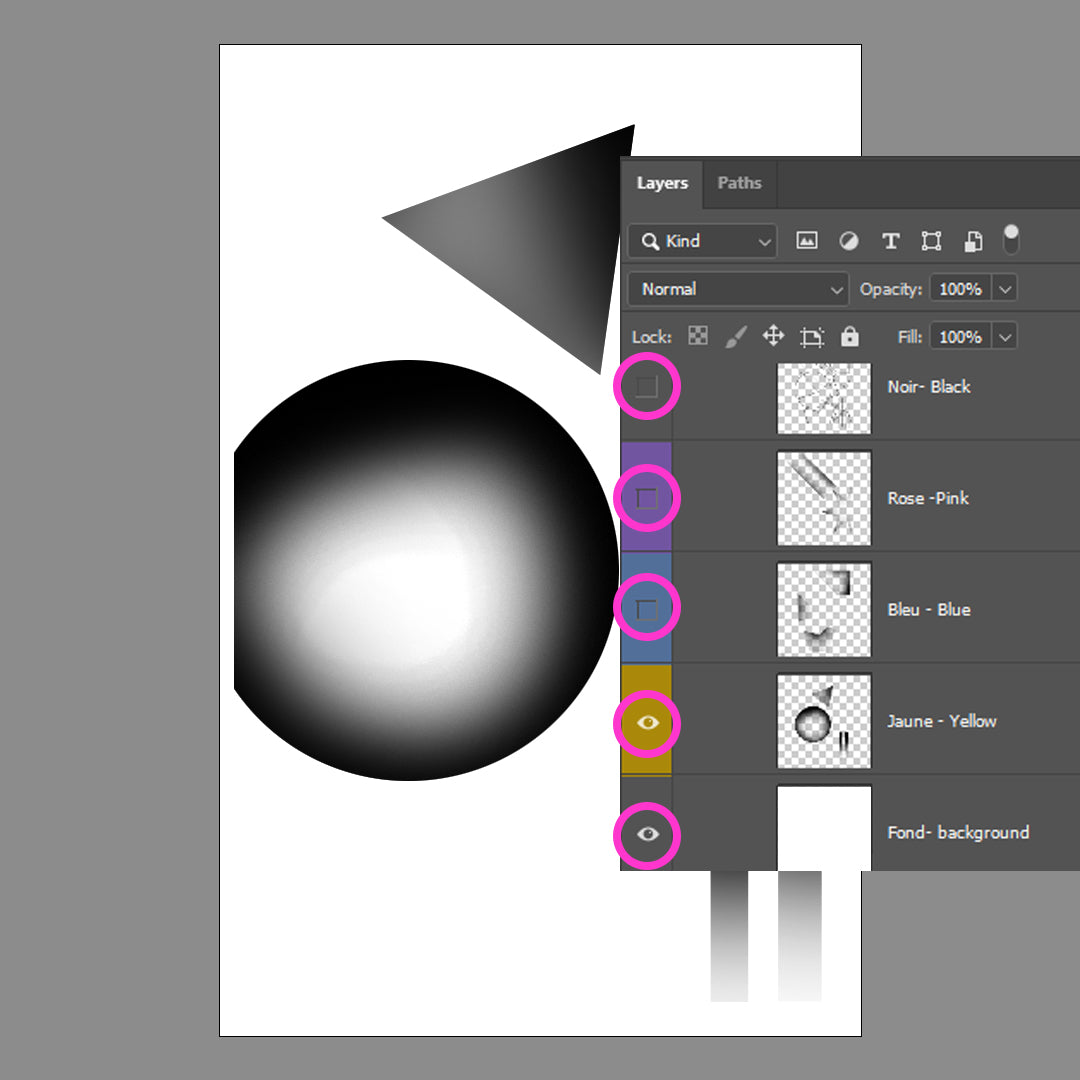
Convert to black values
When you're done designing, convert your layers to the right black values so the printer
can apply the right amount of color.
*Do not change to grayscale or black and white, it will not give you the equivalent black values and colors can come out lighter than intended. -
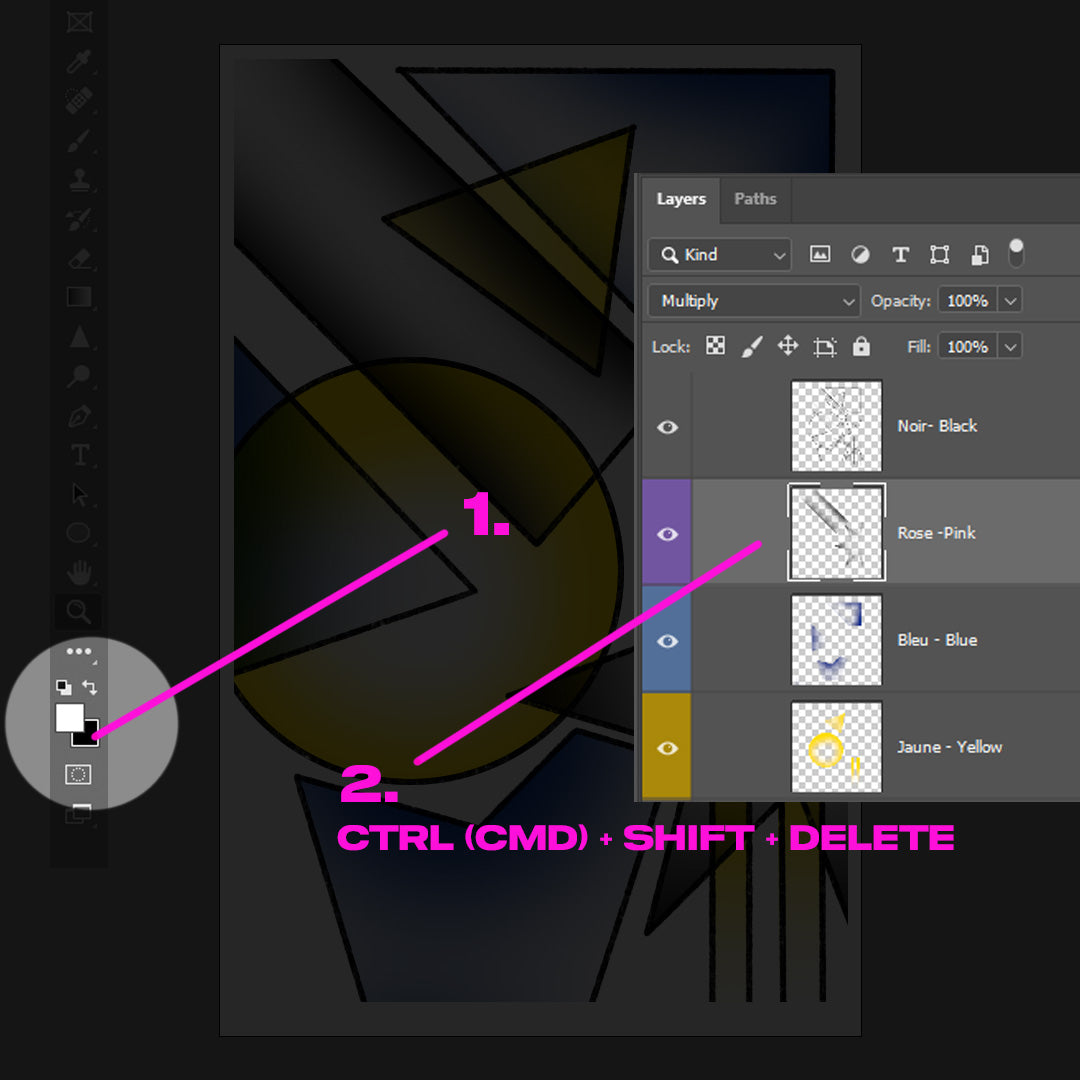
How to convert to black values
1.Set the background color in the color selector to black
2.Select the layer you want to convert and hit CTRL (or ⌘ Cmd) + Shift + Delete.
You should see the layer convert change to black or greys. Repeat for all layers. -
Exporting
Hide the margin and other color layers to export each color layer as a separate PDF file. Select save as pdf.
Name the files by project number if you have multiple projects, then color, then front or back if you're doing front and back printing. Ex: Pink.pdf or Projet3-yellow-front -
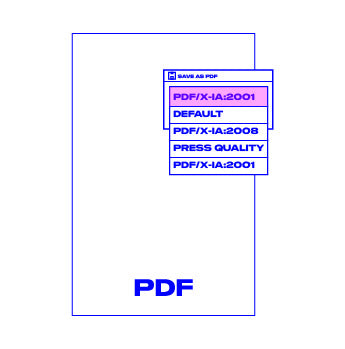
PDF Export
Choose PDF Preset PDF/X-1a:2001
Uncheck preserve photoshop editing capabilities. Place files in different folders if you have
multiple projects


It's a No for me
If color separation is not your thing contact me to get some help or hire me to prepare the files for you